TinkerCAD made 3D printing feel as easy as building with Lego
The best part of 3D printing is not only downloading models. It is getting an idea, building the part you actually need, printing it, testing it, and improving it until the thing in your head exists on your desk.
Why TinkerCAD clicked for me
A lot of CAD tools are powerful, but they can make a simple idea feel heavier than it needs to be. TinkerCAD goes the other way. You start with basic shapes, resize them, stack them, cut holes through them, group them together, and keep building.
That is why it feels so close to Lego. You are not staring at a blank technical drawing wondering what command to use first. You are grabbing blocks, lining them up, snapping ideas together, and making something useful one piece at a time.
Custom tools are the real magic
For me, 3D printing gets exciting when it solves a specific problem. A mount that fits one exact spot. A case that holds the parts I already have. A spacer, bracket, jig, drawer insert, faceplate, or small shop tool that would either be annoying to buy or impossible to find.
TinkerCAD is perfect for that kind of work because the design loop is fast. Build the shape, export the STL, slice it, print it, test it, then go back and adjust the model. When the fit is off by a few millimeters, the fix does not feel like starting over. It feels like moving another brick.
Idea, model, print, test, revise. That loop is where TinkerCAD and 3D printing work best together, especially for practical parts and one-off tools.
Prototyping an Arduino radio
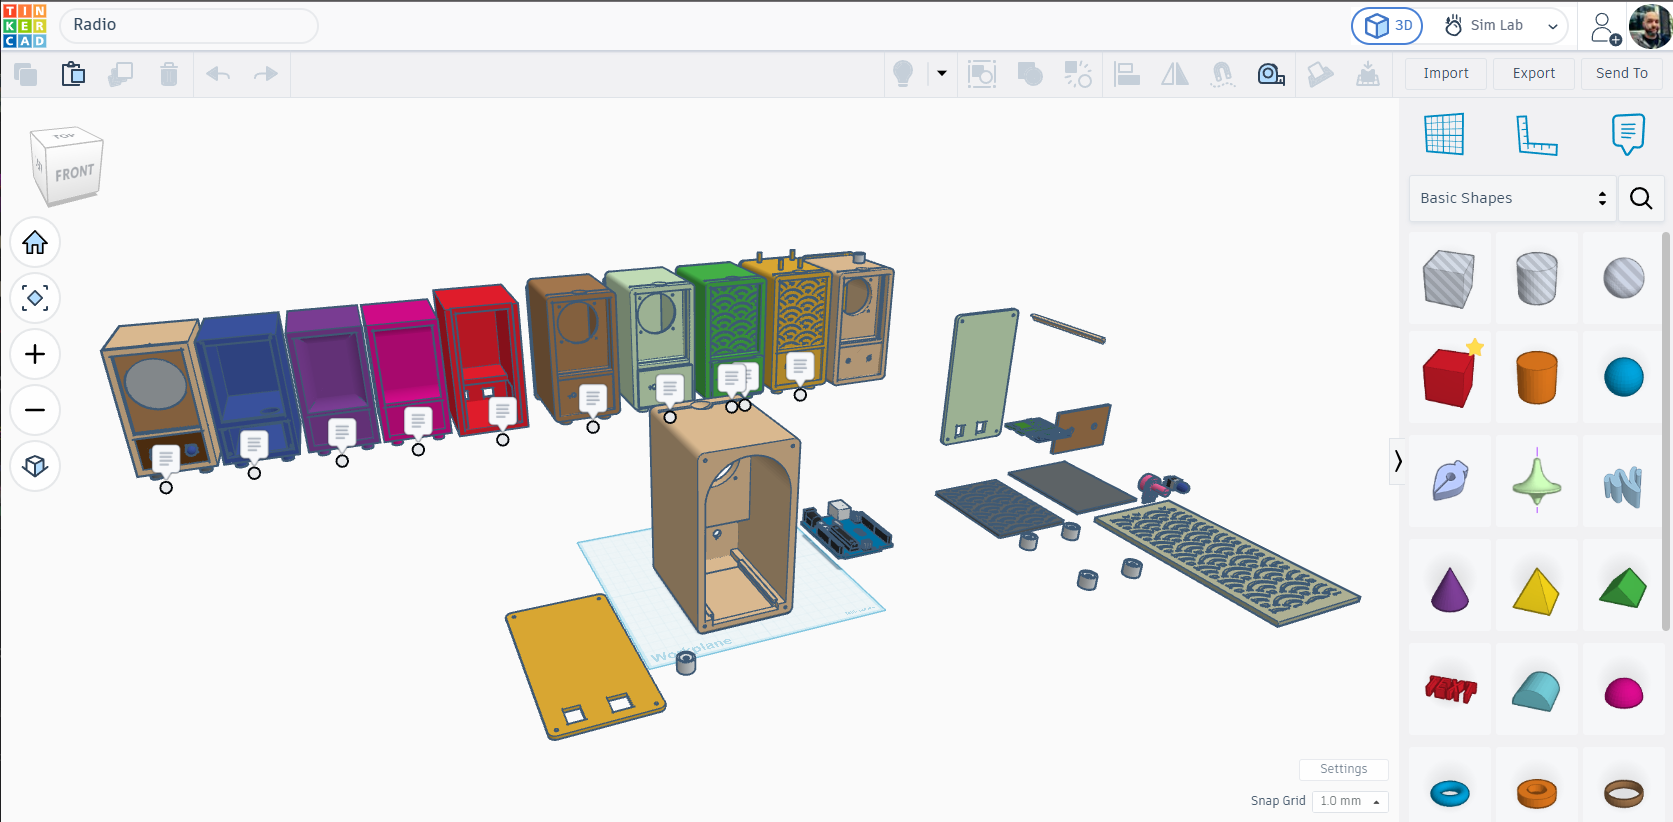
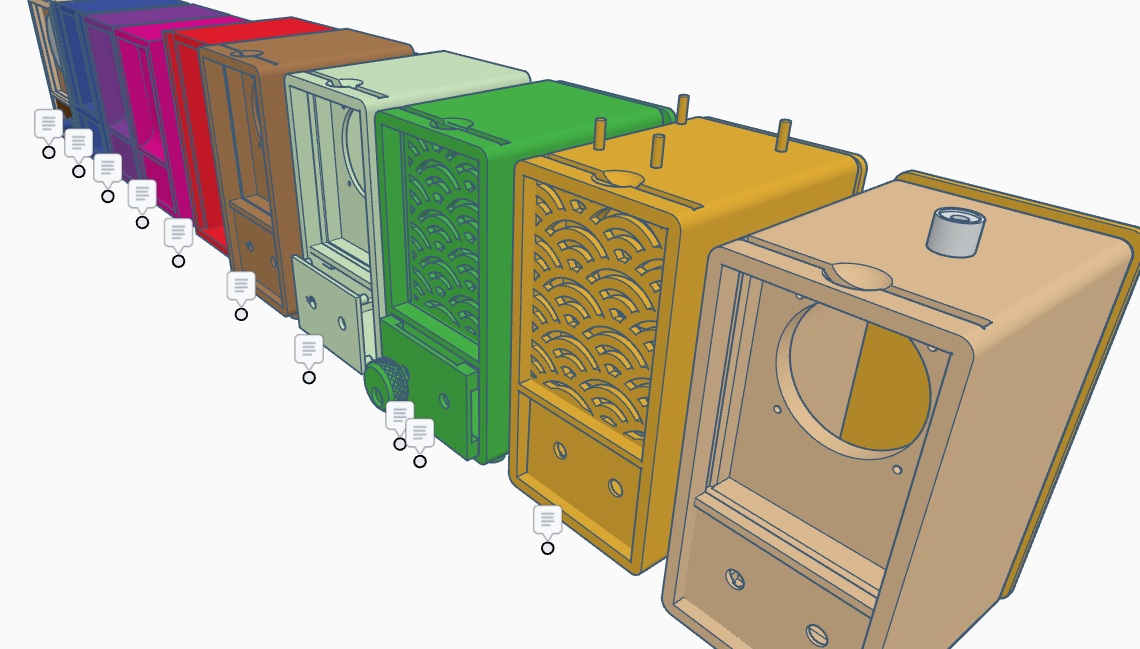
One project I have been working on is a radio enclosure built around Arduino parts. The enclosure needs room for electronics, a speaker, openings, mounting points, a face design, and enough service space that the parts can actually be assembled instead of just looking good on screen.
That is exactly the kind of project where TinkerCAD shines. I can make one version of the case, duplicate it, try a different front panel, test a new grille pattern, move the board mounts, and compare several ideas side by side. The model becomes a workshop bench, not just a file.
From simple shapes to real objects
TinkerCAD does a good job teaching the parts of 3D modeling that matter for printing. You start thinking about wall thickness, screw holes, tolerances, clearance, support material, flat print surfaces, and how a physical part will actually be handled after it comes off the printer.
That learning feels natural because every print gives feedback. If a hole is too tight, resize it. If a wall feels weak, thicken it. If a part needs a lip, notch, tab, or access slot, add it. The software is simple enough that the tool does not get in the way of learning from the print.
Sharing the work on MakerWorld
I have started sharing models on MakerWorld so the projects are not just sitting on my machine. You can view my uploaded models here: Chuck McKinney on MakerWorld.
That sharing side matters. It turns a personal experiment into something other people can inspect, remix, print, or learn from. It also gives me a better reason to clean up the models, explain what they are for, and keep improving the designs instead of letting them disappear into a folder.
Why this matters for printer companies
Good printers make this whole process feel even more immediate. The easier it is to go from a TinkerCAD model to a reliable print, the more likely people are to keep designing, sharing, and building custom things instead of stopping after a few downloaded test prints.
That is the creator story I care about: approachable modeling, reliable printing, useful projects, and a community where people can share real experiments. Companies like Bambu Lab have helped push that kind of experience forward, and I would love to keep building more practical projects around that workflow.
What comes next
The next step for this radio project is getting real photos of the printed pieces, the Arduino parts, and the assembled prototype. Once I have those, I want this post to show the full path: idea, TinkerCAD model, printed enclosure, electronics installed, and the finished object working in the real world.
That is the part I am most excited about. TinkerCAD makes the modeling side feel possible, and 3D printing turns those small ideas into real tools, cases, parts, and prototypes I can actually use.